A few months ago I gave you a sneak peek at a little DIY Bathroom refresh that I was doing. If you saw, you’ll know that I’m not exactly the DIY expert. However, this bathroom was originally a flip and the grey on grey on grey was driving me crazy. So I started look around for a simple, cost-effective hack to make the bathroom cute instead of GREY.
That’s when I came across Angela Rose. She has so many amazing DIY’s and makes you think you can do anything…. and while some of you can; I know I am only capable of so much. Her star bathroom makeover was EXACTLY what I was looking for and the perfect solution for updating my bathroom. And so I began…
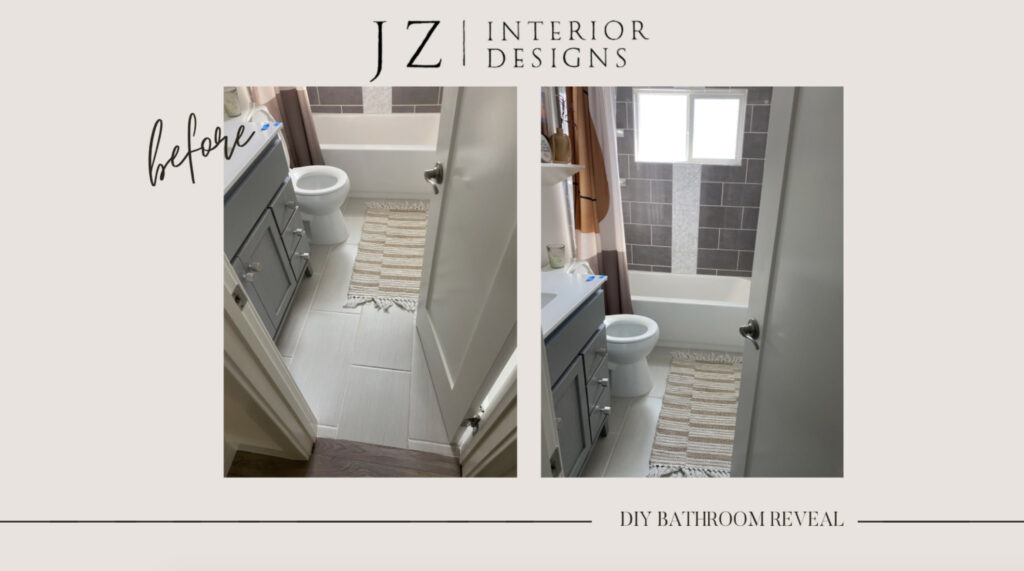
As you can see: GREY ON GREY ON GREY. I don’t love the tile, but it isn’t priority/ important enough for me to want to fix. However, the floor and vanity were something I could fix on my own.
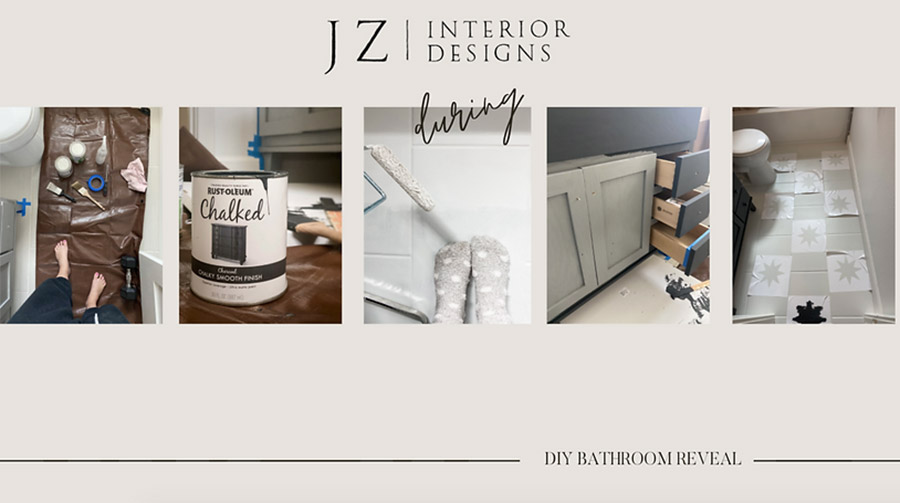
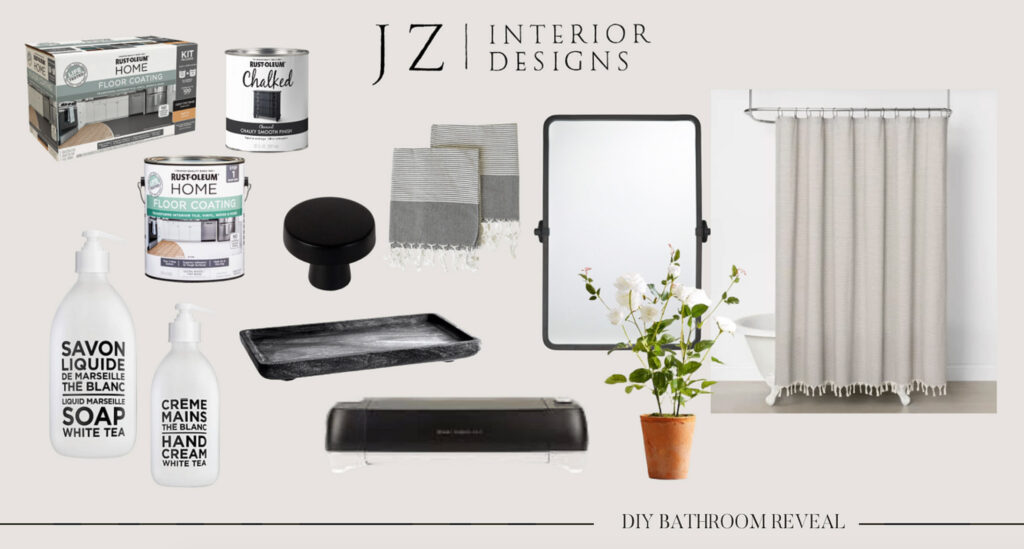
After the vanity, I started on the bathroom floor. So this is actually just painting over tile so when you start, definitely deep clean your floors (Krud Klutter worked great). I used Rust Oleum floor coating in steam grey (I know I am trying to get rid of grey, but this shade is white without being WHITE WHITE). Because of the rectangular shape, I opted to paint over the grout. I did 3 coats. For the stars, I used my Cricut to cut out star shapes on removable vinyl. I painted the stars using this black Rust Oleum floor coating in black. I did 2 coats each…. and when I removed the vinyl, I was not shocked that they weren’t even. So I used a much smaller brush with the steam grey to hand outline the stars and correct any errors. I finished with 4 coats of Rust Oleum floor coating in matte clear.
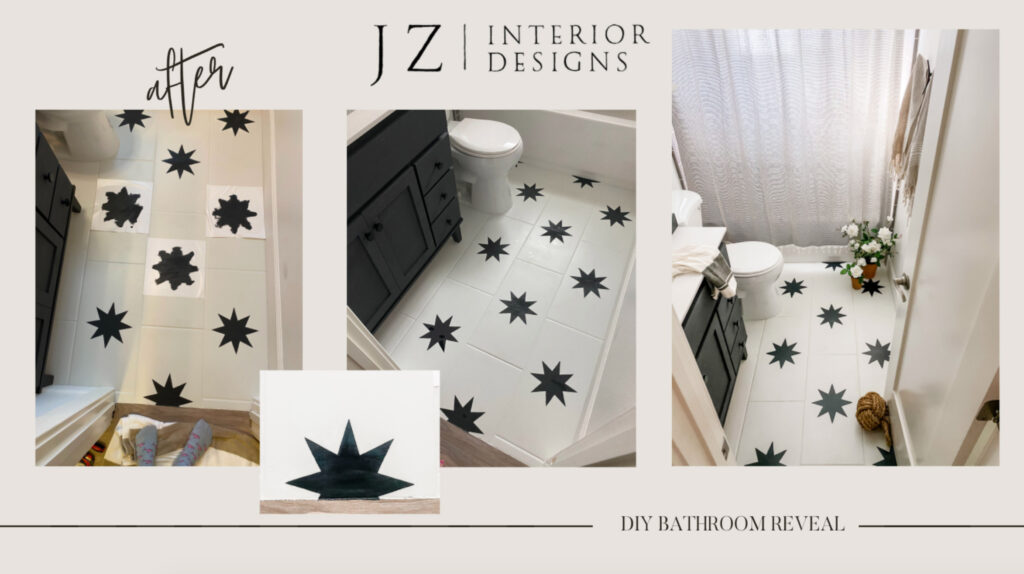
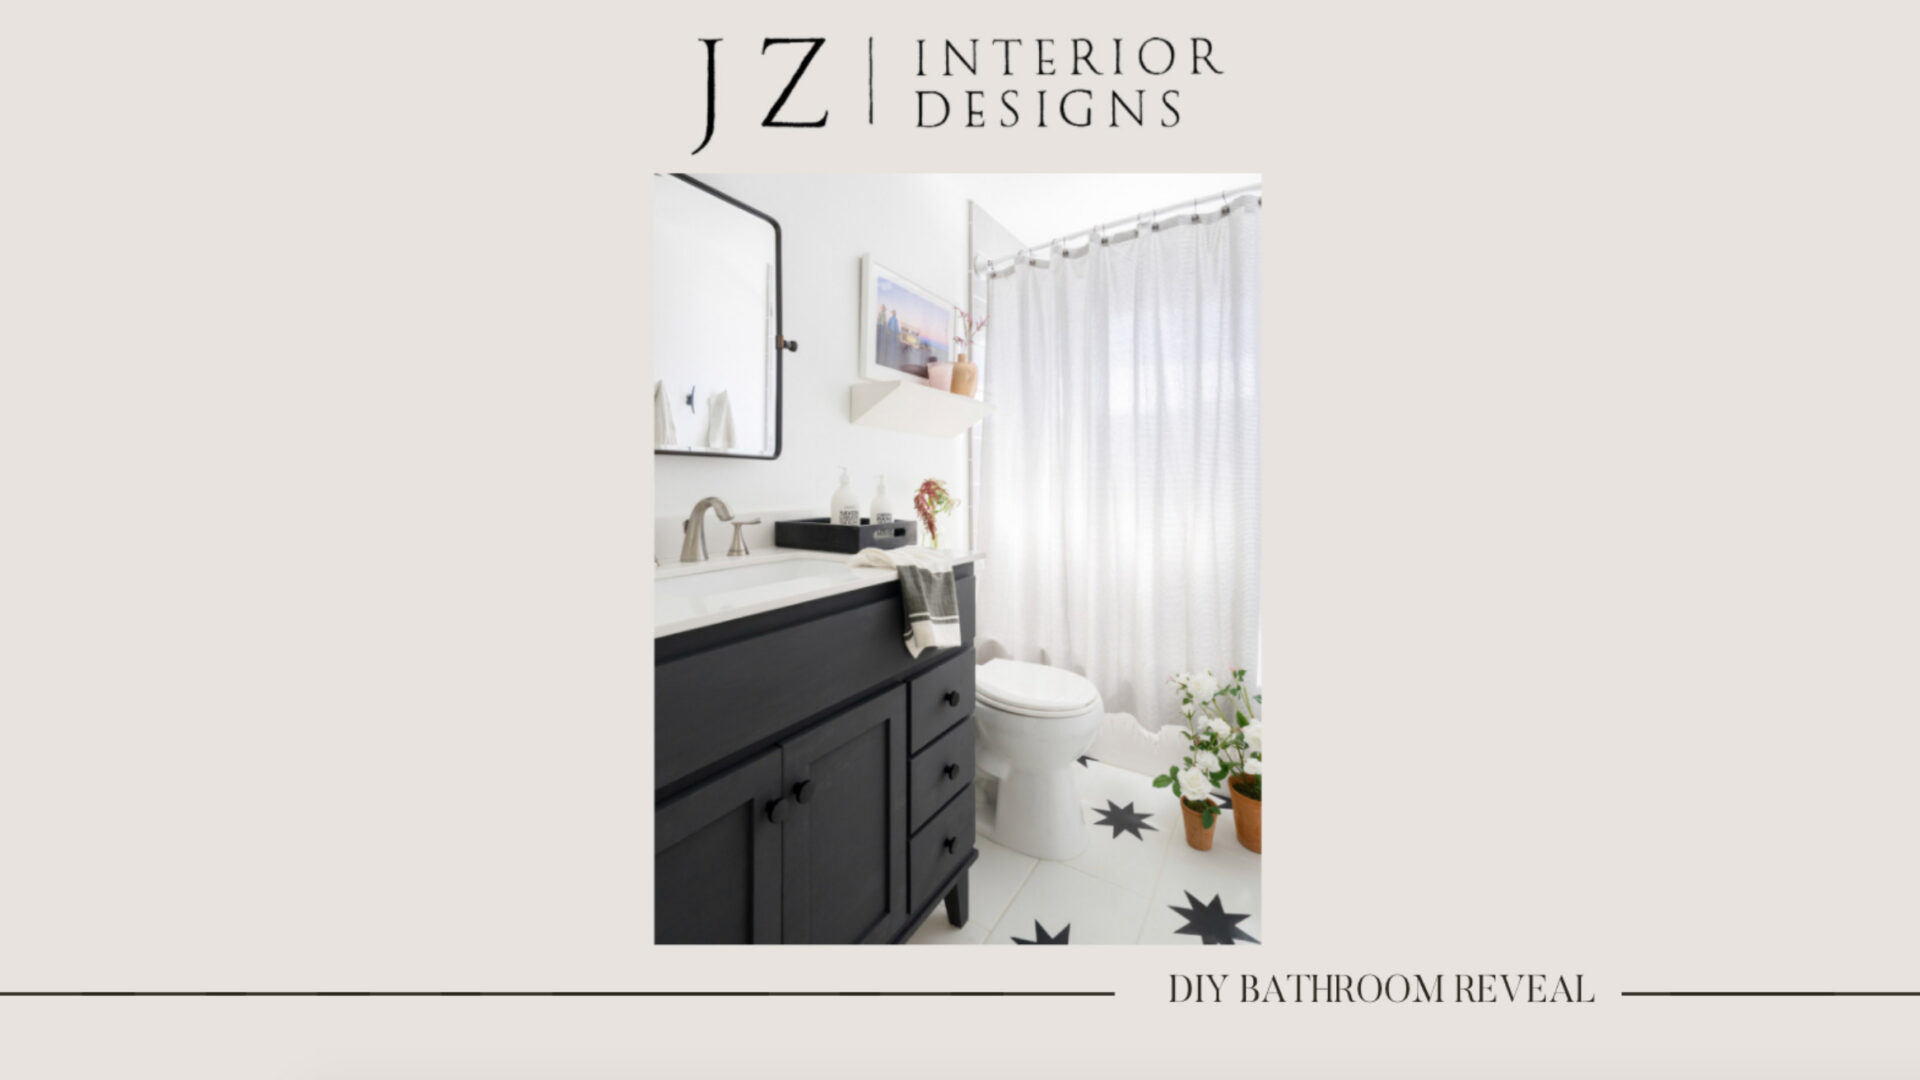
I’m so happy with how it turned out! Linking all the sources here.